About Me

My photo
I would say that I am curious, vivacious, gregarious, sometimes funny, intelligent, easy going, very passionate about the things I love, caring, thoughtful, and kind. Maybe that is a little over the top, but I think you can count on me to be very honest. LOL

Tuesday, July 26, 2022

Creamy Cucumber Salad

Ceamy Cucumber Salad -- not everyone in our family loves cucumbers, but the health benefits outweigh the complaints.  So here we go with one of my favorites! This classic recipe is made with fresh cucumbers, red onions, fresh dill, and a handful of other ingredients for a side dish that everyone (did I just say everyone?)     will love! Well maybe!

It’s light, creamy, and incredibly easy to make. The perfect salad for picnics, pot lucks, or summer grilling.

Whether you grew up on it or are trying it for the first time, you’re sure to LOVE the flavor in this easy cucumber salad!  The best part --- it takes less than 10 minutes to prepare but does require some chill time in the fridge to bring the flavors together. 

There’s something nostalgic about it – it’s a recipe that’s been around forever and a dish that most of us have probably enjoyed at family get-togethers at one point or another.

I love it because it’s such a simple salad, yet it’s packed with so much flavor.

Between the crunchy cucumbers, the creamy sauce, and the fresh dill, this salad truly is no-fuss in every way. It’s easy to make, perfect for prepping in advance, and it stores well in the fridge.

Here is the ingredients list:

  • 1-2 cucumbers
  • ¼ red onion
  • ½ cup mayonnaise
  • ⅓ cup milk
  • 2 tbsp white vinegar
  • 2 tbsp granulated sugar
  • 2 tbsp chopped fresh dill
  • ¼ tsp kosher salt
  • ⅛ tsp black pepper
  • Wash the cucumber and peel 
  • Use a sharp knife or a mandoline to thinly slice the cucumber. I'm lucky to have a super Sous Chef who knows how to slice and dice perfectly.  
  • Thinly slice the onion
  • In a large bowl, whisk the mayonnaise with the milk, vinegar, sugar, dill, salt, and black pepper until combined.
  • Add the cucumber and onion to the dressing and stir until combined.
  • Cover the bowl and refrigerate it for 2 hours.
  • Serve and enjoy


Creamy Hawaiian Macaroni Salad

 Creamy Hawaiian Macaroni Salad is served on every plate for lunch at L&L Hawaiian Barbecue.  This Hawaiian Macaroni Salad is so good, it's addictive and the bowl was gone completely.   It was easy to make, it fed 8 of us, and it tastes awesome. 

Here is how it comes together:

1/2 lb dry elbow macaroni

1/4 cup red onion, minced

1 carrot shredded

1 cup real, whole mayo

1/4 cup green onion, thinly sliced

1/2 tsp white pepper

1 tsp kosher salt

Instructions:

Bring a large pot of well-salted water to boil.  Cook macaroni until tender, about 8 minutes. 

NEXT UP -

Creamy Cucumber Salad   


Sunday, July 24, 2022

Fresh Summer Salsa - Oh We Miss You Grandpa Buffo


 Woo-hoo! I don’t know about your family but salsa is a staple in our family!  Grandpa had a garden that was the envy of the town.    We are trying our best to keep the tradition going.  

Salsa tastes amazing on everything or simply by itself. There is no shame in standing in front of the fridge with the doors open and sneaking a spoonful of salsa.  Salsa is like a magic potion that can transform the worst dishes into something spectacular. So let's get right to Grandpa Buffo's recipe!

4-5 medium ripe tomatoes, diced

1 medium onion, diced - I like red but whatever you have on hand works!

1 green pepper, diced

1/4 cup parsley, chopped 

1 clove of garlic, minced 

1/2 teaspoon salt

1/8 teaspoon pepper

1/8 teaspoon ground cumin

1 squeeze of lime

Combine all ingredients and refrigerate.

Ripe tomatoes are absolutely key to making this garden fresh salsa.  Roma tomatoes are a very good choice since they are less watery.  Core the tomatoes and remove the seeds before chopping.  Use every last bit of the red tomato flesh inside!   

Voila!  


Sunday, July 17, 2022

Zucchini and Tomato Gratin Bake


And they just keep coming....so tender, so delicious, and so HEALTHY????

This dish is made with thinly sliced zucchini, tomatoes, onion, garlic, parmesan cheese, and fresh oregano from the garden!


Ingredients:

1 zucchini, thinly sliced

3 Roma tomatoes, thinly sliced

1 onion chopped

1 clove of garlic, minced

shredded parmesan cheese to cover the top

minced oregano 

Instructions:

1. Preheat oven to 350 F.

2. Saute onion until translucent.  Add minced garlic and saute for 30 seconds.  Transfer 1/2 of the mixture to the bottom of a medium round tart dish.

3. Layer the tomatoes and zucchini in a circle by alternating a layer of 2 zucchini slices and 1 tomato slice until the dish is full.

4. Top with remaining onion-garlic mixture.  Drizzle with olive oil and sprinkle with salt, pepper, oregano to taste.  Top with the shredded Parmesan cheese.

5. Bake the Parmesan zucchini and tomato gratin in a preheated oven for about 35 minutes, or until lightly browned.   


Friday, July 15, 2022

Party Chicken

I’m sure most everyone has had the classic “Company Chicken” recipe that calls for lining the baking dish with chipped beef, right? Well, when I  started making that recipe only to find at the last minute that I had no chipped beef on hand.  So off to the store and I decided to use sliced roast beef instead!  Loved the difference! In this simple recipe chicken thighs are baked in a casserole with bacon, roast beef, and creamy sour cream/soup sauce.   It is perfect for a busy day and keeps well if you want some leftovers.  


A dish as hearty as this needs little else to make it great, but hot cooked rice, pasta, or mashed potatoes work well and soak up the flavorful juices.  On the side, I loved to serve up Peanut Cucumber Salad and some steamed broccoli.  


Party Chicken 

8 boneless chicken thighs 

8 slices roast beef - chopped

8 strips of bacon

16 oz. sour cream

1 can cream of chicken/ 1 can cream of mushroom

Lightly grease 9×13 glass casserole dish and line with chopped beef.

Wrap bacon around the chicken and lay them on top of the beef

Mix sour cream and soups together.
Pour over chicken

Cook for 45 minutes at 350 degrees or until tender.

The sauce thins as it cooks but you can also add water to create a thinner sauce.

Saturday, July 9, 2022

Oh What do you do in the Zucchini Patch?


 Zucchini Brownies are rich and oh so chocolately!  With zucchini abundance here is what we made this afternoon.  

Zucchini Brownies 

Ingredients:

1/2 cup vegetable oil

1 1/2 cups white sugar

2 teaspoons vanilla extract

1 egg

2 cups all-purpose flour

1/2 cup cocoa powder

2 teaspoons baking soda

2 1/2 cups grated zucchini undrained

Frosting:

1/3 cup milk 

1/3 cup butter

1 1/2 cup white sugar

1 cup chocolate chips

Directions:

1. Preheat oven to 350 degreets

2. Grease and flour a 9 x 13 pan

3. Combine oil, sugar, egg, and vanilla.  In a separate bowl, combine flour, cocoa, and baking soda.  Ad the flour mixture to the sugar mixture and stir well.  It will appear quite dry.  Gently stir in the zucchini mixing until fulling incorporated.  Spread the mixture into your prepared pan.  

4. Bake 25- 30 minutes

Frosting:

While the cake is cooling, combine butter, milk, and sugar in a small pan.  Bring to a boil over medium heat.  Allow it to boil vigorously for 30 seconds.  Remove from heat and stir in chocolate chips. Pour over warm brownies.  Let cool completely before cutting.  

Next up ---- Air Fryer Zucchini Fries!


Sunday, May 8, 2022

May Your Mother's Day Be....

Filled with good memories

of delicious food...
beautiful bouquets
splashes of sunshine fruit....and salmon bowl
homemade gifts from the littlies....
Let’s be honest, mothers are superheroes and deserve to be showered with love all year round — but there’s no denying they deserve it a little bit more on Mother’s Day. So we enjoyed our day in Park City at The Harvest!


  • Thank you for all the hugs, words of encouragement, and patience through the years.

Friday, January 1, 2021

Happy 2021


Bagna Calda

Guido Buffo – from Ida Bruno Steve’s God Mother

Pronounced “banya cowda” Bagna Calda is a hot dip composed of olive oil, garlic and anchovy made for dipping raw vegetables and bread.

½ pound butter (2 sticks unsalted is best)

½ cup olive oil (optional – but so flavorful)

4-8 cloves garlic, minced

2 cans anchovies, chopped

Combine butter, oil garlic and anchovies.  Heat gently for 10 minutes – DO NOT BOIL OR BROWN

Serve hot with assortment of cold vegetables. Cabbage leaves rolled up are the very best!


From the Recipes book of:     La Dolce Vita Famiglia di Buffo

                                        A Collection of Secret Family Recipes


From scratch Lasagna recipe to follow!

Thursday, October 15, 2020

 BBQ Mac and Cheese Pie


This easy dinner is comfort food for the gkids.   Big K asked me to make it this morning; only he described it as that thing you make that you cut like a cake and it has red strips of skinny things in it.  I tried all morning to show him pictures of what I thought he was thinking - from Chow Mein to Meatloaf.   Finally I found just the right thing!  YEAH THAT'S IT!  

Recipes:
Instant Pot Mac and Cheese which is also a favorite just by it's little old self.   In fact today I had a serving or two left over that were delish for lunch!

Ingredient
    8 oz uncooked elbow macaroni
    2 cups chicken broth
    1 Tablespoon Butter
    1/2 t. hot sauce
    1/2 t. garlic powder
    1/4 t pepper
    1/4 t salt
1 cup shredded cheddar cheese
1/2 cup shredded mozzarella cheese
1/2 cup shredded parmesan cheese
1/4 - 1/2 cup of milk

Directions:
1. Add the uncooked macaroni, chicken broth, butter, hot sauce, garlic powder, pepper, and salt to the Instant Pot.
2. Place the lid on the pot and set to sealing.  Cook on manual function, high pressure for 5 minutes.  Then do a quick release.
3. Add the milk, then the cheese to the pot in 3-4 handfuls, stirring in between each addition until smooth and creamy.   Season as necessary to taste. 
**The Mozzarella can get a bit stringy, if you don't like that texture, just use more of the cheddar cheese.

BBQ Pulled Pork

This is so easy I hesitate to tell you.   I buy the package of Pulled Pork from Costco and for this recipe I use half a package.  I put the whole package in the Instant Pot  (I put it a vegetable steamer basket) and add 1 cup of water to the bottom of the pot---yes I have 2!   Cook it for 30 minute from frozen.  When finished I let it natural release, remove the meat, drain the water, and shred the meat back in the pot.  Then pour a bottle of your favorite BBQ Sauce over it.   I take half of it out and freeze it for another meal.   

Assembly:

I use deep dish pie crust that are in the freezer section of your local grocery store.  Let them thaw while you are preparing all the fixings.   Then put a layer of the mac and cheese on the bottom, followed by the layer of bbq pulled pork.  Top with the second crust.   At this point you can put it in the fridge covered with plastic until you are ready to bake it or bake immediately.   

BAKING:

1. Preheat oven to 425 degrees.
2. Remove Plastic.
3. Brush w/ light egg wash for extra golden crust — optional
4. Baking from thawed: 45-60 minutes or until warmed through. Cover crust with foil if too browned before fully baked.


Wednesday, August 26, 2020

Are We Hibernation?


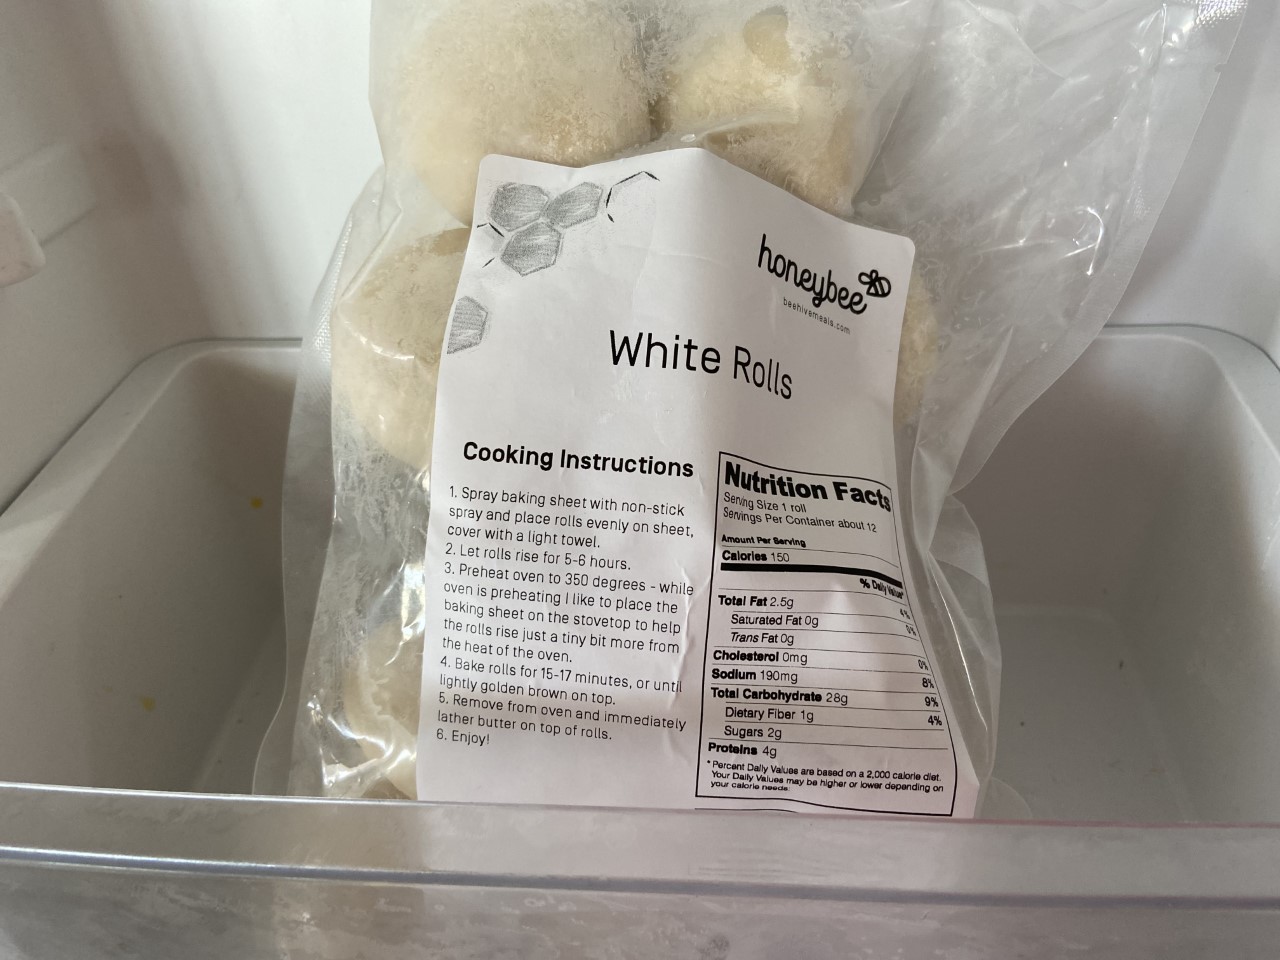
Today my order from Honeybee Beehive Meals arrived.    I am so excited to try this food option.   10 meals packaged/frozen and into the freezer ready for the day I need them.  It is packed well, with the pasta and rice in their own packages and the frozen rolls look perfect.  

Meals for this delivery included:
Honey Sesame Chicken
BBQ Chicken Sandwiches
Pesto Mozzarella Chicken Pasta
Cilantro Lime Chicken Taco
Teriyaki Chicken Stir Fry
Chicken Burrito Bowls
Salsa Verde Pork Tostadas
Carne Asada Tacos
Sausage Penne Pasta
Vegetarian Chili Mac


As I unloaded the cooler and put it all into the freezer Big K said...."What is this?"   "Are we hibernating or something?"  

Maybe so, but I quickly got the crock pot down from it's storage place and put Honey Sesame Chicken on to cook for the day.   

Dinner will be served with Asian Chopped Salad and Broccoli side dishes!   I'll update after the meal!


Monday, August 24, 2020

Today is Rosemary Bread Day

 This is my version of the recipe, there are many on the net, I tweaked until I got the fine-tuned recipe I'm in love with. It takes some work, but the aroma and comfort that come from the oven makes it all worth every minute.


Ingredients:
1 1/4 cups water, warm 110 degrees
1 teaspoon sugar
2 teaspoons honey
2 tablespoons yeast
4 1/2 cups bread flour
3 tablespoons olive oil
2 tablespoons fresh rosemary, chopped
1 tablespoon fresh garlic, chopped
1 1/2 teaspoons sea salt
Cornmeal ---to sprinkle on baking sheet

Preheat oven to 375 degrees
Directions:
Mix the water, yeast, and sugar together with 1/2 cup of the flour and let sit for 10 minutes.

Meanwhile heat the olive oil and garlic together over low heat for two minutes to lightly cook the garlic; do not brown.

Combine all remaining ingredients and mix until a stiff dough is produced; knead for 6 to 8 minutes....lucky me I have a Kitchenaid....thanks mom!

Place the dough in a mixing bowl and cover with plastic wrap; or towel; let rise for 1 hour or until
double in bulk. Note if you lightly oil the dough before covering with plastic wrap, it will be easier to remove from the bowl without sticking after it has risen.

On a floured surface, divide the dough into two equal parts and form into two round loaves by shaping them with your hands. Place on baking sheet that has been sprinkled with cornmeal, cover loosely with plastic wrap and let rise for thirty minutes.

Gently remove the plastic wrap without pulling on the dough, pierce the dough directly in the center with a sharp knife or other pointed implement. Push firmly from the top of the dough all the way to the bottom of the pan, quickly remove the knife or implement.

Immediately place the dough into the pre-heated oven and bake for 30 minutes. Remove from the oven and let cool slightly on wire racks.

Yields 2 loaves.....Enjoy with seasoned dipping oil.

Sunday, August 23, 2020

Sour Cream Cookies


I have been making these cookies since 1974 and I want to tell you that my anxiety about making them is extremely high.....Maybe it’s because the dough can be finnicky and trying to cut it into those cute school buses and even circle shapes without leaving half of the dough behind in the cookie cutter gives me anxiety.

But today Big K wanted to help me in the kitchen so I said - Sour Cream Sugar Cookies it is!

Recipe: 

Ingredients:

1/2 cup butter

1 1/2 cups sugar

2 eggs

1 cup sour cream

1/2 t salt

1/2 t baking soda

2 t. baking powder

1 t. vanilla

3 1/2 cups flour

Directions:

Cream together butter and sugar, then add eggs 1 at a time and mix well.  Add sour cream and mix until well blended.  

Sift together salt, soda, baking powder and flour.   Add to the creamed mix.  Add vanilla and mix just until well mixed.   Dough will be very soft and sticky - no worries anymore I used to roll them out but today I landed on a new trick...

Roll about 3 T into a ball and place on a cookie sheet.  Spray the bottom of a glass with cooking spray and then dip into a plate coated with a thin layer of sugar.  Press each ball down slightly to get it the correct thickness.  Not too thin because these cookies are best when they are thick and soft. (This step totally released my anxiety about cleaning up a mess of dough and flour on my counter tops!  Now there will be many more days of making this deliciousness!)


Frost with your favorite!   I use butter, powdered sugar, heavy whipping cream and a drop of food coloring!   


 A couple keys to success for the perfect sour sugar cookie is to:

TIPS FOR MAKING THE BEST Sour Cream SUGAR COOKIES

  • Do not melt the butter! The butter needs to be softened (at room temperature), but using melted butter will ruin the cookies.
  • Spend a little extra time when you mix the butter/shortening and sugars. Creaming them together for 2-3 minutes will improve the consistency of your cookies.
  • I always use eggs at room temperature as well.
  • Make sure that you don’t press the cookies too thin! You want them to be about 1/4 of an inch thick. If the cookies are too thin, they will get crispy and not be the deliciously thick and soft cookies that you are hoping for!
  • Preheat the oven. This will help your cookies turn out right every time!
  • Make sure not to over bake your cookies.  They may not even look totally done on the tops, but if the bottoms start to brown, I take mine out and they are perfect!
  • Use parchment paper or a silicone baking mat. Doing this will make it really easy to remove the cookies from your cookie sheet so that you don’t have to scrape them off the pan – they will just slide right off in perfect shape!

Tuesday, August 13, 2019

Back To School Baked Oatmeal

Our junior chef Kendry really wants to learn to cook. This morning he made Baked Oatmeal. It is scrumptious. Great thing about it, you mix up a batch bake only what you want and save the rest in the fridge for tomorrow. 


Baked Oatmeal


Mix together:

1 1/2 c milk
2 eggs
3 T melted butter
1 t vanilla

Combine:
2 1/2 c oatmeal 
1/2 c brown sugar
1 t cinnamon
2 t baking powder
Pinch of Salt

Mix all together

Put in fridge until ready to bake.

When ready for a hot, delicious breakfast … pre-heat oven to 350 degrees. Prep desired number of custard cups by wiping inside of cup with butter. Spoon oatmeal in to 1/3 full then add sliced banana, strawberry, raspberry, etc. Then spoon in more oatmeal mixture to 2/3 full. Add a few pieces of sliced fruit. Set on a cookie sheet in oven and bake about 20-25 minutes. Serve milk or cream.

Makes about 8 individual servings.

Thursday, July 26, 2018

It’s Very Quiet Today


Not a single worker on site today????   Oh this process is taking forever!

back door of house

electrical panel


electrical side view

front of houseback of house

Wednesday, July 25, 2018

Meeting with the Landscaper

Landscape pre-lim

Contractors are busy people.   Our good friend Corey told us he would not be able to even look at our needs until maybe late September.   Sad for us because we know he is one of the best.   However, we did find Paul who was so willing to draw up plans for us and I’m impressed with his work!  Of course, there will be changes but the above photo is a preliminary drawing of what will happen!   Trees, shrubs, plants, water feature, raised garden beds, fire pit, basketball court, and trampoline….I’m ready!

Here goes with the picture overload of what we will be using.  Plus a few that I can’t live without…..my dad’s lilac bushes!

Abbott PotentillaBlack Eye Susanbloodgood-japanese-mapleBurning BushCampanula Mix ColorColumbine Mix ColorsCone Flower Mix ColorsDawyck BeechDaylily Mix ColorDwarf BoxwoodsDwarf Magnoliafern-leaf-bleeding-heartFlowering PearApricot TreesFruit Tree PeachGlobe SpruceHosta MixImperial Honey LocustKarl Forest Grass
Kelsey DogwoodLavenderliatris-spicataMulberry  Fruitless300Musashino-Columnar-ZelkovaParkway MaplePenstemon Mix ColorRed Weeping Japanese MapleRhamnus-FINE-LINE-_Buckthorn_Rose of SharonShasta_DaisySpiraea-Gold-FlameSummer Wine Nine BarkVariegated Irisvariegated-redtwig-dogwoodVeronicaWeeping White FirGarden Vegetables

trampoline

Stone Address

Not our address but we will be having an etched stone done by Jay Jones.

fire pit flagstone rock bubble fountain

Tom is going to do our fire pit and our bubble rock fountain!

This is all a long ways off, but I’m excited that the plans are in place.

Tomorrow the insulation team will be working, followed by the sheet-rock team!

Everyone was working today on the 4 way inspection list and I think we are ready for the next inspection!

Whoopie Whoopie!